Guides · Troubleshooting
FEP vs nFEP (PFA) vs ACF release film
Understand what the three vat-film names mean, why printer compatibility outranks generic claims, and when damage or rising failure rates justify inspection and replacement.
This page contains Amazon affiliate links. As an Amazon Associate we earn from qualifying purchases. Prices and availability can change; check the exact listing before buying.
We haven't tested these products. This comparison is based on makers' published specifications and manuals, retailer listings and owner reviews (checked 15 November 2026).
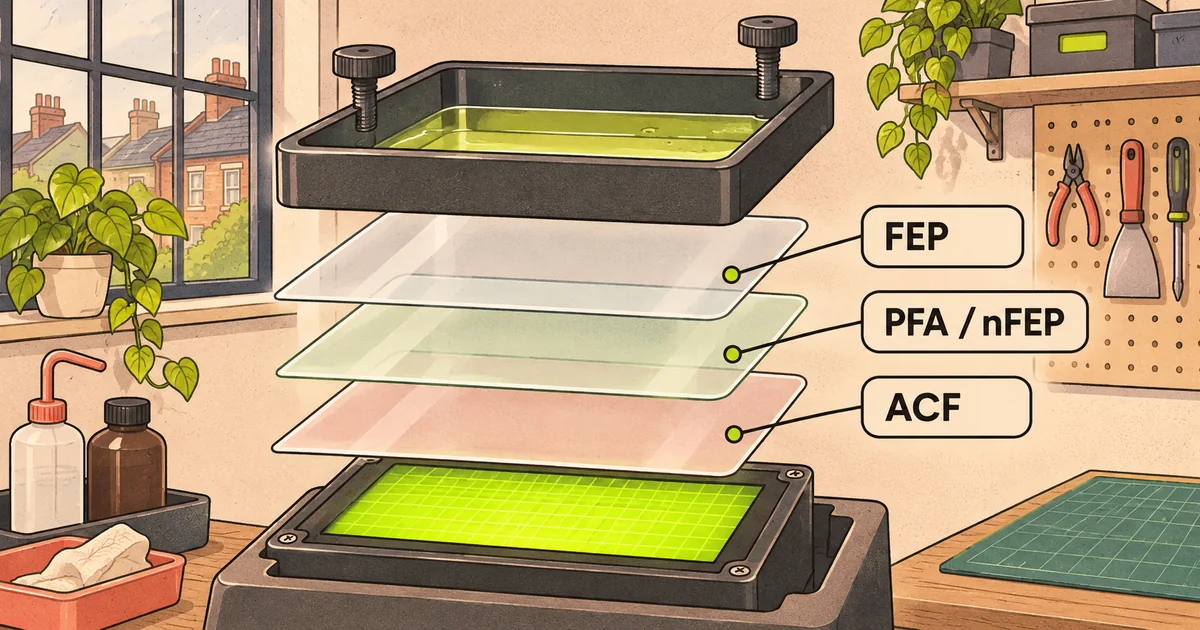
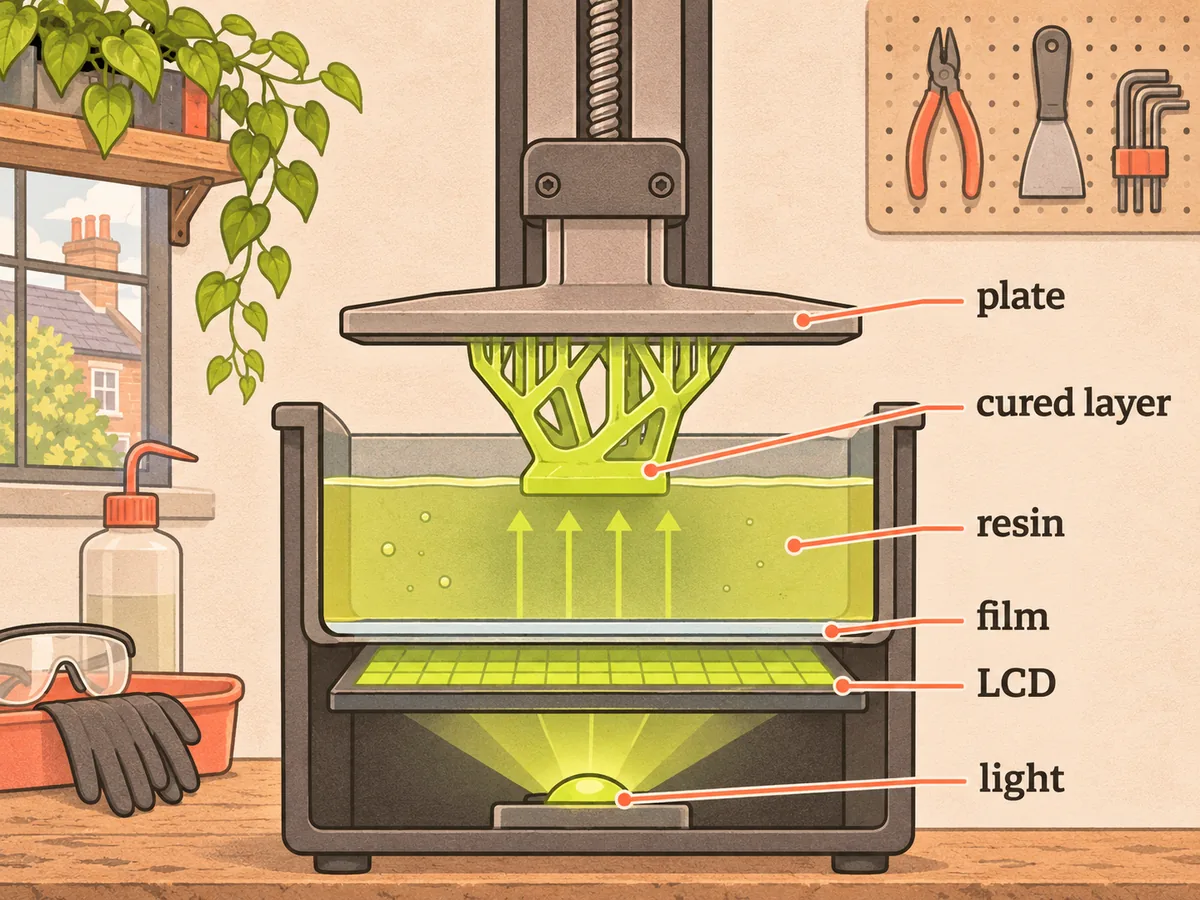
FEP, PFA—often sold as nFEP—and ACF are transparent release films fitted to the bottom of a resin vat. UV light passes through the film while each cured layer must release from it as the build plate lifts or the vat tilts. The right replacement is the type, thickness, surface orientation, size and installation method approved for the exact printer.
Generic “lower release force” claims are not enough to change film. A motion profile, optical system and resin can be designed around a particular material. Start with the printer manual and official parts list, then use the film maker's installation instructions.
What each name describes
Phrozen describes all three as transparent sheets that allow UV light through and form the vat surface against which the model prints. Its support article identifies ACF as Advanced Composite Film and PFA as the material frequently called nFEP. “nFEP” is a market name; when ordering, use the printer maker's terminology and part number rather than assuming every listing means the same construction.
FEP is the familiar baseline on many printers. Phrozen specifies it for the Sonic Mini 8K S. PFA or nFEP is offered for a range of Phrozen machines in the maker's sizing table. ACF is used on some faster systems; Anycubic lists an improved ACF film for the Photon Mono M7 Pro.
These examples show why “upgrade” is the wrong default frame. A Mini 8K S owner should not replace its documented FEP with ACF merely because another maker uses ACF on a high-speed M7 Pro. Light transmission, texture, tension, motion settings and physical fit belong to a system.
FEP
FEP is a fluoropolymer film used as the transparent vat bottom on many established MSLA machines. Its strengths are wide familiarity, official installation instructions and ready availability in model-specific sizes. Its limitations are the same as any consumable film: it can become scratched, dented, cloudy, loose or punctured.
With a manual-tensioned vat, installation procedure matters. Screw order, frame design, film slack before tightening and final tension are printer-specific. An online “frequency” or sound reading is not a universal specification unless the manufacturer publishes it for that vat. Follow the manual, inspect for wrinkles and leak-test as directed before returning the vat over an LCD.
PFA or nFEP
Phrozen groups PFA and nFEP together in its support material and offers PFA sizes for several printers. Owners often choose it for release behaviour, but compatibility still comes first. A sheet that physically covers the frame may have the wrong thickness or installation assumptions.
Use the official size table and printer support page. Phrozen says dents, scratches, deformation, reduced print quality or increased failure rates can indicate replacement is due. Those are inspection triggers, not a fixed print-count lifespan. Resin spills, cured debris and a dropped tool can end a new film immediately; a carefully used film can remain serviceable longer.
ACF
ACF is a composite release film used on some high-speed printers. Phrozen's comparison attributes a smoother surface and reduced suction force to ACF and connects it with fast-curing resin performance. Anycubic specifies improved ACF on the M7 Pro. That is maker evidence for those systems, not proof that ACF produces the sharpest result on every printer.
Some ACF products have a specific orientation, so installing the wrong face towards the resin can defeat the intended surface. Its optical appearance may differ from FEP. Do not diagnose it as damaged simply because it is not perfectly glass-clear like a different film; use the maker's acceptance criteria.
Release force is a complete-system problem
The cured layer adheres both to the build plate or previous layer and to the release film. The machine must separate it without tearing supports or detaching the print. Cross-sectional area, hollow suction cups, lift or tilt motion, resin viscosity, temperature, exposure and film condition all matter.
A film change cannot compensate safely for a closed hollow model acting like a cup. Add drain and vent paths in the correct places and review the slice layer by layer. A large solid raft and broad parallel face can create high loads on any film. Orient geometry to avoid abrupt area changes and provide a support path strong enough for the load.
If a failure begins after a film change, check installation and the correct protective layers first. Confirm the sheet type and orientation, inspect for wrinkles, check the vat frame and fasteners, then return to the official resin profile. Do not increase exposure and lift distance simultaneously; changing several variables hides the cause.
Inspection before every print
With gloves and eye protection appropriate to the resin, inspect the vat for cured fragments before lowering the plate. Use the printer's documented cleaning or exposure method rather than scraping blindly against the film. A small cured shard can be pressed into the film and screen by the build plate.
Look for:
- punctures, leaks or resin beneath the vat;
- deep scratches, creases, dents or stretched areas;
- persistent clouding that is not simply the specified film texture;
- loose fixing screws or a damaged frame;
- cured resin stuck to the film;
- a sudden change in release sound or failure pattern.
Stop if there is doubt. The cost of a film is lower than resin reaching the LCD stack. Clean any spill exactly as the printer maker instructs; solvents can damage polarisers, seals and screen protectors.
Replacement workflow
- Empty and filter reusable resin only by the resin and printer maker's procedure.
- Decontaminate the vat while retaining all liquid and wipes as chemical waste.
- Photograph film orientation and frame order before disassembly.
- Use the exact model's manual, fastener sequence and specified sheet.
- Keep dust, hair and sharp tools away from the new optical area.
- Leak-test away from the printer using the maker's method.
- Reinstall, run the required calibration or reset and begin with an official profile.
Never pour removed resin or wash liquid into a drain. A punctured film may have allowed resin onto the screen protector or into the machine; isolate power and follow service guidance rather than flooding electronics with cleaning liquid.
Which should you buy?
Buy the manufacturer-specified film for your exact machine and revision. Choose an official or traceable part with stated size, thickness and orientation. If the maker approves more than one type, compare the documented motion profile and quality trade-offs for your resin. Avoid anonymous sheets described only as “universal”.
Film is one part of reliability. The failure guide covers plate adhesion and layer separation; the support guide covers suction cups and cross-section.
Sources
- Phrozen: differences between FEP, PFA (nFEP) and ACF — maker support, accessed 15 November 2026.
- Phrozen film sizing guidance — maker support, accessed 15 November 2026.
- Anycubic Photon Mono M7 Pro specifications — maker page, accessed 15 November 2026.
Check current Amazon UK listings
These neutral links are places to check current availability, not extra recommendations. Confirm the exact model, size, colour, compatibility and current price on the listing. Product titles were checked 15 November 2026; sale prices change.
Read next
Orient resin models by cross-section and visible surfaces, support every island through a load path, and hollow only with drain and vent openings that work during print and wash.
TroubleshootingTroubleshooting failed resin prints without changing everythingDiagnose plate adhesion, layer separation, support failure, suction cups, cloudy surfaces and cracks by locating the first bad layer and changing one controlled variable.