Guides · Troubleshooting
Troubleshooting failed resin prints without changing everything
Diagnose plate adhesion, layer separation, support failure, suction cups, cloudy surfaces and cracks by locating the first bad layer and changing one controlled variable.
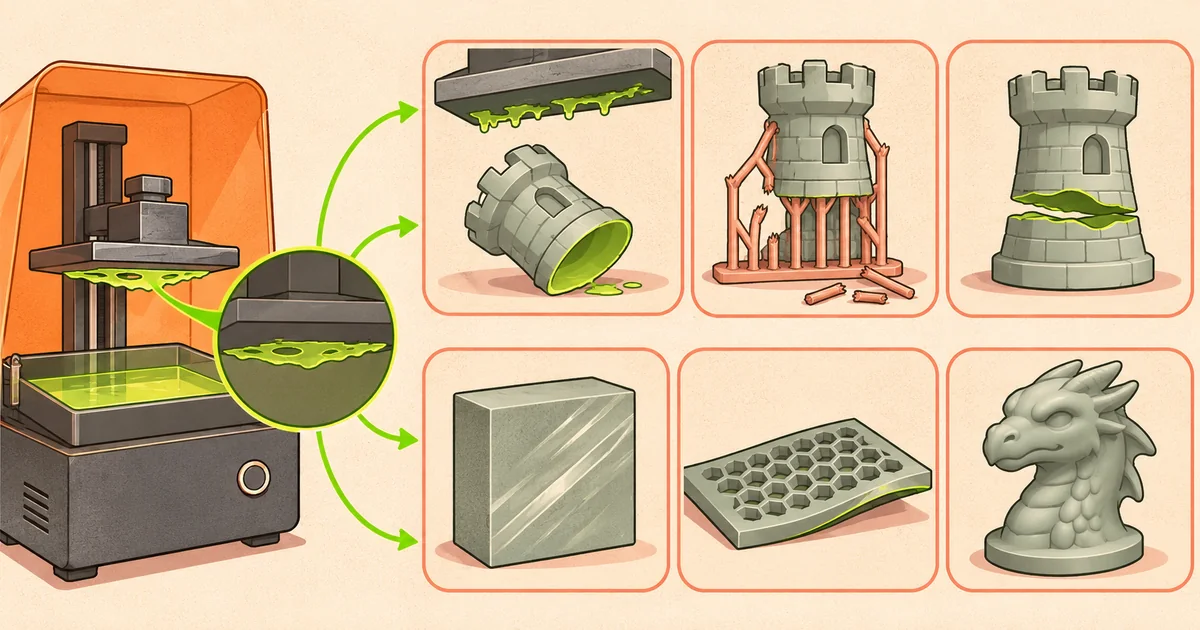
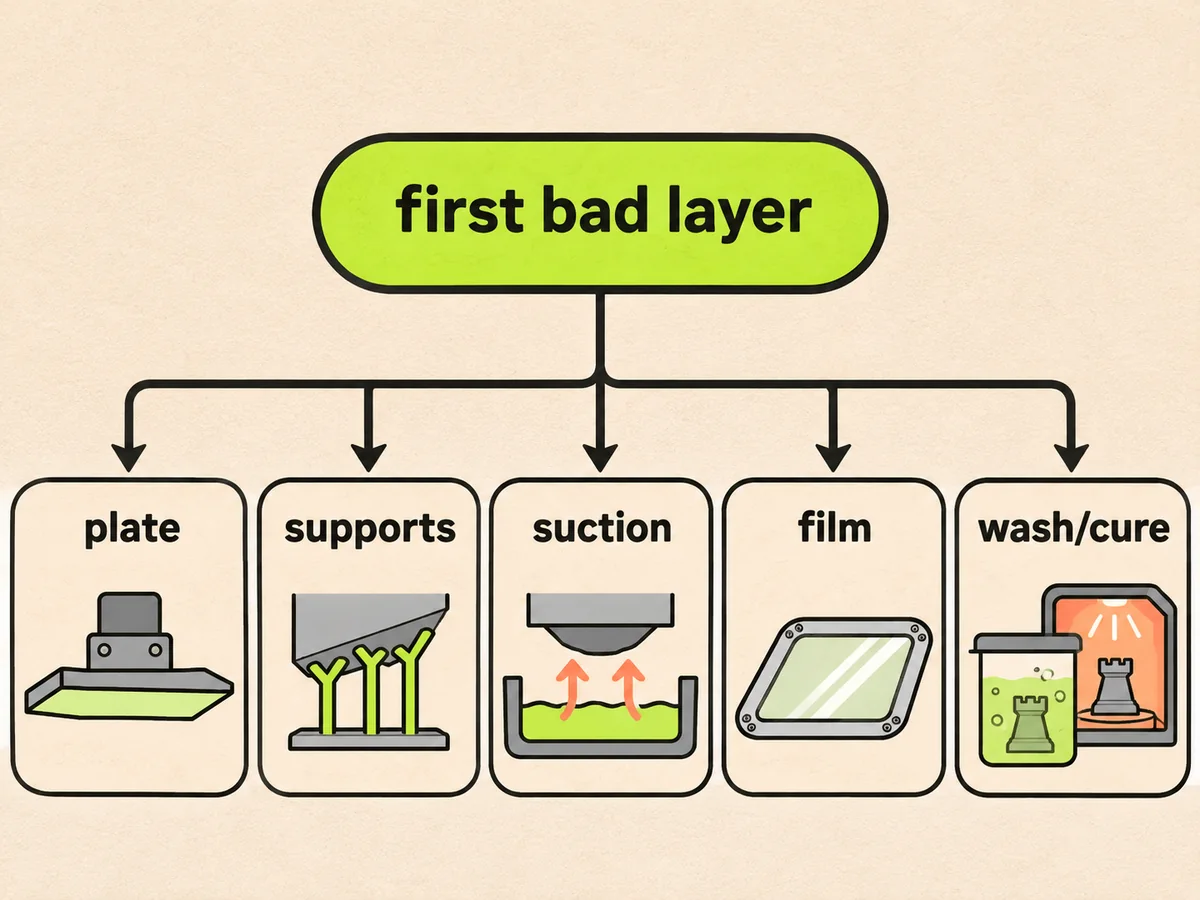
A useful resin failure diagnosis begins with evidence: preserve the failed part, photograph the plate and vat, note the room and resin temperature, save the sliced file and locate the first layer that differs from the preview. Changing exposure, lift, supports and levelling together may produce a print, but it does not identify the cause.
Stop before the next run. A failed print can leave cured pieces on the release film. Lowering the plate onto them can puncture film or damage the screen. Use the printer maker's vat-clean or debris-removal method, retain contaminated waste and inspect the film.
Nothing on the plate, a pancake on the film
The bottom layers cured but did not remain on the plate. Check, in order, whether the correct file and resin profile were used, whether the build plate was installed and secured, whether the machine's documented levelling or calibration is current, and whether the plate surface is clean and undamaged.
Compare bottom exposure and bottom-layer count with the resin maker's profile for the exact printer, colour and layer height. Anycubic publishes model-specific starting settings on its resin manual page. Do not copy a random longer exposure: excessive bottom cure can make removal dangerous and distort the base.
Check resin temperature against the maker's range and mix as instructed. Cold viscous resin may refill and release differently. Do not improvise an unsafe heater around IPA or an open vat. Finally, inspect the film for cured residue, damage or incorrect installation.
Raft present, model missing
If the raft and some supports remain, plate adhesion worked. Find the height where supports stop or the model begins to flatten. In the slicer, inspect that exact layer for a large area jump, a new island, an unsupported overhang or a hollow cup.
Strengthen the structural path at the first failure, not only above it. Add an anchor support to early heavy mass, brace long columns and reduce abrupt cross-section by reorientation. A forest of fine tips can flex together. Confirm support contact settings were not imported from a different resin without calibration.
For a hollow model, check that a drain or vent hole exists before the cavity creates a suction cup. CHITUBOX documents holes as a path for resin to escape, but their layer position matters. A later hole cannot relieve earlier layers.
Layer separation or a horizontal split
A split at a consistent Z height can come from insufficient normal exposure, a sudden area increase, weak supports, motion settings, resin temperature, interrupted movement or contamination. Compare the physical height with the slice. If several different files split at the same machine height, inspect Z motion and hardware according to the manual rather than altering the model.
Return to the maker profile. Confirm normal exposure, rest times, lift distances and speeds. Change one setting and repeat a small controlled model. More exposure strengthens cure only up to the point where accuracy and support removal suffer; it cannot repair a binding Z axis or damaged film.
One side fails
A one-sided pattern suggests plate alignment, uneven plate condition, vat seating, light or LCD defects, local film damage or geometry concentrated on that side. Rotate the same small test in the slicer without changing other settings. If the defect remains at the machine coordinate rather than following the model, the machine path becomes more likely.
Run the printer's documented LCD test with the cover and eye precautions specified. Inspect the screen protector for cured resin or clouding. Never scrape a bare polariser with a metal blade or flood it with an unapproved solvent. Contact maker support when the test shows missing regions.
Repeated holes, columns or missing pixels
A defect repeating in the same XY coordinate across unrelated layers can point to the mask, screen or contamination in the optical path. Check the sliced preview first; a corrupt mesh or unsupported island may be present in the file. Then inspect the vat bottom and protector.
The Mars 5 Ultra maker page describes a residue-detection feature, but a sensor does not replace inspection. Run self-checks and firmware steps exactly as the manual states. Save photos and the test image for support.
Film noise, sticking and sudden failure rate
Release makes sound, and the normal sound differs by printer, resin, layer area and film. A changed sound combined with new failures is evidence to inspect, not a frequency specification. Phrozen says dents, scratches, deformation, reduced quality and increased failure rates can indicate replacement is needed.
Confirm the exact film type. FEP, PFA/nFEP and ACF have different constructions and maker applications. Check frame assembly, film orientation where relevant, wrinkles, leaks and fasteners. Follow the official replacement method and leak-test away from the printer. Read the film comparison before substituting materials.
Cloudy, chalky or sticky surfaces
These are often post-processing symptoms rather than printer exposure alone. Record wash liquid, bath age, wash duration, drying and cure. A saturated first bath can leave resin on the surface; an incompatible or excessive soak can alter it; retained cleaner can create marks during cure.
Use a dirty and cleaner wash under the resin instructions. Dry fully, especially inside cavities, and cure for the exact resin and colour. Do not keep adding UV without diagnosing cleanliness. A glossy patch could be uncured resin; handle it as contaminated until resolved.
Cracks after printing
Cracks in a hollow print raise concern about retained liquid resin, trapped wash fluid, insufficient internal cleaning, weak thin walls or cure stress. Keep the part contained and away from skin. Do not patch a leaking model for indoor display without addressing the contents.
Review the original slice for closed cavities and inadequate openings. Drain and vent holes should allow exchange during washing and drying and remain open until the interior is treated. Consider printing solid, splitting the model or increasing a validated wall structure on the next attempt.
Dimensional error and closed holes
Overexposure can enlarge cured regions and close small holes, but support pull, orientation, anti-aliasing, resin shrinkage and post-cure can also shift dimensions. Print a documented calibration piece in the working orientation. Measure after the full wash and cure process, because a green dimension is not the final part.
Change normal exposure in small maker-supported steps and record it. Do not use the printer's pixel pitch as a guaranteed tolerance. For a fit, design clearance based on repeat measurements from the exact process.
The controlled retry sheet
Record file hash or version, printer firmware, slicer version, resin name, colour and batch, layer height, normal and bottom exposure, bottom layers, lift or tilt profile, temperature, support changes, wash and cure. State one hypothesis and one changed variable.
If the retry fails differently, preserve that evidence. If three controlled attempts point to the same hardware coordinate or motion height, stop consuming resin and contact the maker with the files and photos. Random parameter escalation costs more than a careful support case.
Sources
- Phrozen film condition and sizing — maker support, accessed 15 November 2026.
- Phrozen FEP, PFA and ACF comparison — maker support, accessed 15 November 2026.
- Anycubic resin profiles and manuals — maker settings, accessed 15 November 2026.
- CHITUBOX model editing — slicer documentation, accessed 15 November 2026.
Read next
Understand what the three vat-film names mean, why printer compatibility outranks generic claims, and when damage or rising failure rates justify inspection and replacement.
Printing and post-processingResin supports, orientation and hollowing: a layer-by-layer methodOrient resin models by cross-section and visible surfaces, support every island through a load path, and hollow only with drain and vent openings that work during print and wash.