Guides · Printing and post-processing
Washing and curing resin prints without losing control of waste
A step-by-step post-processing workflow for draining, two-stage washing, support removal, drying, UV post-cure and segregating contaminated liquids and solids.
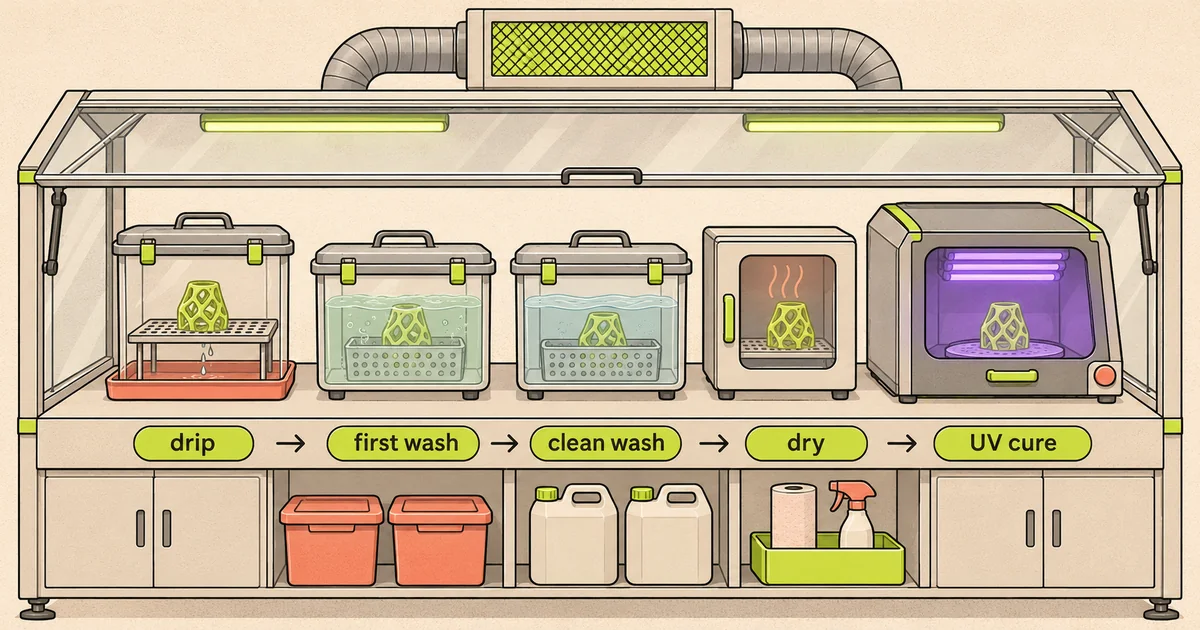
Washing removes liquid resin from a printed surface; post-curing completes the maker-specified light treatment. Between them, the object remains a contaminated “green” part. Keep it inside the controlled resin zone, wear the PPE required by the SDS and treat every drip and support as uncured until the process is complete.
The most repeatable workflow is linear: drain, dirty wash, cleaner wash if specified, dry, inspect, remove supports at the appropriate stage, post-cure, then segregate waste. Crossing backwards spreads contamination.
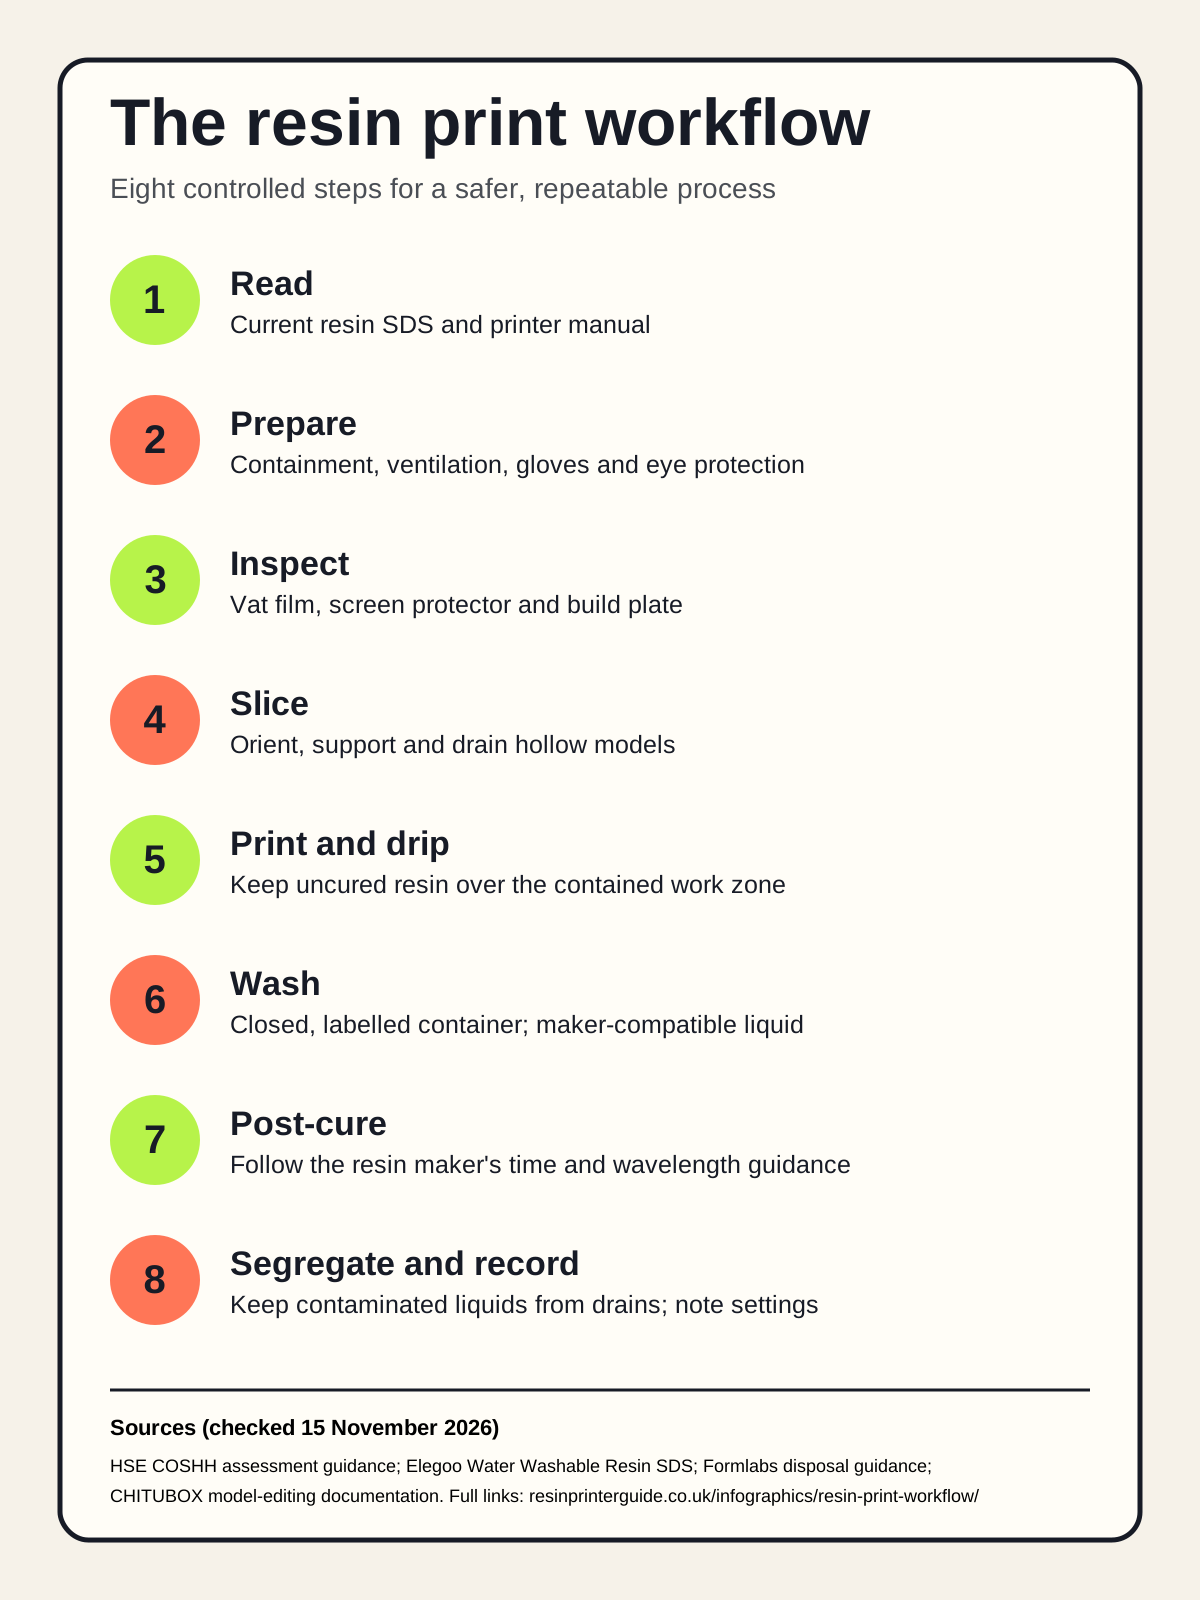
1. Prepare before the print ends
Set out a lipped drip tray, compatible scraper, first wash, clean wash if used, drying rack, cutters, curing station and waste containers. Label every liquid container. Check that the wash basket accepts the model and that the cure chamber leaves room for light to reach it.
Turn on the designed source control before opening the printer. Put on suitable nitrile gloves, chemical splash eye protection and protective clothing based on the current resin and cleaner SDS. Keep clean controls—phone, timer, door handle—outside the route of contaminated gloves.
2. Drain over the vat
Let the completed print drip above the vat using the printer's documented position or a secure compatible bracket. Do not leave it so long that the maker warns of deformation or unwanted light exposure. Tilt only in a controlled way so resin returns to the vat instead of running over the build-plate handle.
Inspect for obvious detachment, loose pieces or a failed raft before moving the plate. A loose cured fragment can fall into the vat. If a failure may have left material on the film, stop and use the printer's documented vat-clean method before the next print.
3. Transfer within containment
Move the plate directly to the wash area over a tray. If the station accepts the full plate on a bracket, confirm the exact mechanical fit and published wash envelope. Elegoo gives separate basket and hanging dimensions for the Mercury Plus V3.0; Anycubic publishes a 230 × 140 × 260 mm cleaning volume for Wash & Cure 3 Plus.
Plate washing reduces an early handling step but carries more liquid resin into the bath. Removing first can prolong the bath but introduces scraping while the part is wet. Follow the printer and wash-station manuals, use a stable tool angle and keep hands out of the scraper path.
4. Use a dirty and clean wash
A two-stage system separates bulk contamination from final cleaning. The first sealed bath receives the resin-heavy part. The second, cleaner bath removes the remaining film. This can keep the finish bath useful longer, but both liquids are contaminated and need controlled disposal.
Use only the cleaner the resin maker specifies. For an IPA-cleaned resin, control flammable vapour and ignition sources. For water-washable resin, use water only as directed and remember that the water now contains photopolymer. Elegoo's water-washable SDS still lists skin, eye and sensitisation hazards.
Do not exceed a maker's soak time. Prolonged immersion can affect surfaces or allow liquid into cavities. Agitation should be contained. Brushing can splash; ultrasonic equipment has separate solvent and fire limitations and must be explicitly suitable for the liquid and process.
5. Wash hollow parts internally
Hollow models require at least a functional drain path and usually a second opening for air movement. Orient openings during washing so the cleaner exchanges rather than trapping an air pocket. Rotate and drain until no liquid remains, following the resin instructions.
A hole added only at the top of the final display orientation may not drain during printing. Review the slice from the first hollow layer. CHITUBOX's hole tool exists to allow resin to escape, but the operator must choose location and size. Trapped uncured resin can contribute to later cracks and leakage.
6. Dry and inspect
Let the compatible cleaner leave the surface fully before UV cure. Keep drying under source control where vapour or residual resin requires it. Do not use a food oven, hair dryer or unapproved heater. Compressed air can aerosolise contamination and spread it beyond the tray.
Inspect under good light. Glossy patches can indicate liquid resin or retained cleaner, though appearance alone is not a chemical test. Rewash only if the maker's process calls for it; do not cycle indefinitely. Check cavities through drain holes and ensure supports are not concealing pools.
7. Remove supports at the documented stage
Some workflows remove supports while the part is green because contacts cut more easily; others cure first for stability. Use the resin maker's advice and consider the geometry. An uncured part needs full chemical controls. A cured brittle support can fly when clipped, so eye protection remains sensible.
Cut supports over a tray, away from the body. Use dedicated flush cutters and support the model so removal does not tear a thin feature. Warm-water methods sometimes appear in hobby advice, but water contacting uncured resin becomes contaminated. Use only a maker-documented process and retain the liquid.
8. Post-cure to the resin instructions
Match the wavelength and duration to the exact resin, colour, part thickness and equipment. Anycubic's Wash & Cure 3 Plus uses 405 nm LEDs; Elegoo publishes 405 nm LEDs for Mercury Plus V3.0. Their timers allow a range, but the correct setting comes from the resin instructions, not from the timer maximum.
Space models so they do not shade one another. Rotate complex parts if the station does not illuminate every recess. Thin parts can heat and warp; heavily pigmented or thick parts can need a different procedure. More time is not automatically a better cure.
Manage wash liquid and waste
Formlabs says not to pour liquid or partly cured resin into drains or household waste and not to pour IPA containing dissolved resin into drains or household waste. Apply the same caution to contaminated water and check the exact product and local authority guidance.
Keep dirty and cleaner baths sealed and dated. When they no longer perform, use the resin maker's settling, recovery or disposal procedure and the council's accepted hazardous-waste route. Filtering moves solids into a filter; it does not certify the remaining liquid for a drain. Contaminated wipes, gloves and supports also need the specified cure and local waste route.
For a full layout, see Resin Wash Bench, checked for an HTTP 200 response on 15 November 2026. Compare equipment in best wash and cure stations.
Record the process
Log resin, colour, batch, printer, layer height, exposure, room or resin temperature, wash liquids and durations, drying time and post-cure. When a surface turns cloudy or a part cracks, the record distinguishes a changed bath from a changed exposure.
Sources
- Anycubic Wash & Cure 3 Plus — maker page, accessed 15 November 2026.
- Elegoo Mercury Plus V3.0 — maker page, accessed 15 November 2026.
- Formlabs resin and solvent disposal — maker guidance, accessed 15 November 2026.
- Elegoo Water Washable Photopolymer Resin SDS — safety data sheet, accessed 15 November 2026.
Read next
Compare Elegoo Mercury Plus V3.0 and Anycubic Wash & Cure 3 Plus by published washing and curing capacity, then decide whether separate stations suit you better.
Resins and materialsIPA vs water-washable resin: two cleaning systems comparedCompare IPA-cleaned and water-washable resin by fire risk, chemical exposure, drying, waste handling and maker instructions—not by the word washable.
Printing and post-processingResin supports, orientation and hollowing: a layer-by-layer methodOrient resin models by cross-section and visible surfaces, support every island through a load path, and hollow only with drain and vent openings that work during print and wash.